Showing posts with label garry cook. Show all posts

Monday, November 17, 2014

Some Garry Cook photographic links

Most of my photography over the past 18 months has been occupied by long-term projects. Some are listed here.

The two most significant are Palestiniana (2013) a book about the troubles between Israel and Palestine detailed within five fun-packed days in the West Bank. It's packed full of photography.

And then there is Stay At Home Dads Are Not Welcome Here (2014) a book about taking a one-year old (my daughter) to various Women-filled playgroups. The photos for this book were shot entirely on a mobile phone camera. But not just any mobile phone - the best one available (then and now), the Nokia Lumia 1020.

Both books covers are shown below. And here are the links to buy them:


Stay At Home Dad... Kindle links
http://bit.ly/SAHDkindleUS
http://bit.ly/SAHDkindleUK


Tuesday, September 17, 2013

WARNING: Poor quality images on this blog

This blog is now packed full of low-res images thanks to a Posterous > Wordpress > Blogger import.

Thankfully hi-res images can be found at www.gazcook.com but on this site you will just have to squint and pretend the images are sharp*.


*NOTE: Though, strangely, if you click on an indicudal image a larger, sharp image can be seen.

Bye.

Wednesday, July 17, 2013

Palestiniana, the book set for release

My story, with images, on Palestine is about to be released in book form and on Kindle.

To find out more about it and to see some of the images, see Palestiniana's own blog.

The blog includes the final cover for the book, which is not the cover shown below.

This image was taken in Qalqilya, in the West Bank in November 2012.

Monday, August 20, 2012

Marlboro Nights, Come To Where The Smoking Was (looking back at the ban on smoking in public)

[gallery]My six-week exhibition at The Continetal in Preston has just come to an end.

Marlboro Nights the exhibition marked the fifth anniversary of the ban on smoking in public in public in England (July 1, 2007).

Marlboro Nights the book is availble now on Amazon in the UK and the US.

This big brash book documents smokers before the ban and then follows them as they were forced to go outside. Some of the portraits can be found elsewhere on this blog (or on www.gazcook.com where you can buy a signed copy from the store), below are some lovely landscape shots.

Garry_cook_smoking_028
Garry_cook_smoking_005
Garry_cook_smoking_010
Garry_cook_smoking_019
Garry_cook_smoking_021
Garry_cook_smoking_030
Garry_cook_smoking_031

NOTE:

Smoking_kills2

Wednesday, March 21, 2012

Talking about smoking photographs at Redeye's Hothouse

[gallery]
Redeye, if you didn't know, is one of the UK's leading photography organisations - or networks as it likes to say.

It's a national outfit but it just happens to be based in Manchester.

For the last two years I was lucky enough to work under one of its larger projects, Lightbox. For this project I attended a week-long photography seminar and exhibited Women and Alcohol at Look2011: Liverpool International Photography Festival. Women and Alcohol also made its way to London for the Photomonth 2011: East London Photography festival.

And in March 2012 I presented my 2007 project, Flashes to Ashes, at Hothouse.

The event was a series of projects talks by photographers from various disciplines. There was a lot of people in the audience. They asked me a lot of questions about smoking.

Hothouse_garry_cook
This work will be exhibited properly for the first time this summer to coincide with the fifth anniversary of the ban on smoking in public places in England.

Sunday, February 27, 2011

Very boring blog on problems with Adobe Dreamweaver, FileZilla, Soundslides, Autoviewer

Please DO NOT read this unless you have searched for solutions to problems in building your own website. This blog is too long and boring for the casual reader.
Building a Dreamweaver website from scratch
Part 1 – General list you need to follow
1 Create folder
2 Add four folders: css, images, html, working
3 Dreamweaver: SITE > New Site > Connect > Connect to your new folder
4 Create new html template.html
5 Create CSS: File >new > blank page > css
6 link html and css page: be on template page > click on link symbol (CSS Styles Panel)  and find styles.css
7 Create css * style: NEW CSS Rule > [COMPOUND] [*]
8 create wrapper (typically 960 wide or 650 wide): LAYOUT > insert div tag >
Add after start of tag #wrapper // add after end of tag #mainbox etc
Now there is obviously much more to Dreamweaver than the above – but this is not a how to article. This guide aims to simplify the problems I cam up against when creating, adding flash and uploading my website.
Some of the problems were complicated, some were simple – but, at the time, all were incredibly frustrating.
Part 2 – Adding a Soundslides show
Soundslides is a paid-for program written by a photojournalist I use to add music or audio to a set of images.
To add a Soundslides show onto Dreamweaver do not use the Insert > media >SWF button. It does not work.
You don’t need to convert your Soundslides show into an avi movie.
Set the size of show you require within the Soundslides program (and remove titles/captions to your preference).
Simply create it as usual, then copy the folder (which includes _notes/custom/full_screen folders and all other files into a Soundslides file in your Dreamweaver web page directory.
Then drag the Soundslides shockwave flash file onto the page where you want your slideshow to appear.
The slideshow should now work.
On your Dreamweaver page, set the height and width of your box to ensure the Soundslides show will fit inside it.
If, on testing it, the Soundslides show buffers quickly (and by that I mean it does not run smoothly) then something has gone wrong. Create the show again. This has happened on a few of my shows but I’m not sure why – possibly I exported before Soundslides had finished saving any new changes I had just made.
Part 3 – Adding an AutoViewer slideshow to Dreamweaver (these notes should be applicable to similar sister slideshows like SimpleViewer). AutoViewer is free, or paid-for with increased flexibility.
Make sure you have Adobe Flash
Download AutoViewer script into Adobe Photoshop.
Warning: The newest version – Photoshop CS4/CS5 - for of this did not work on my Photoshop CS4 system.
I had to download the earlier CS3 version. There is no apparent reason for the CS4/CS5 script not to work.
Use the script (FILE > scripts > autoviewer)
Set source folder (where your images are) and destination folder (where you would like the converted files to appear). I created a new folder for this.
Copy converted image files to Pages>images folder in your Dreamweaver website folder. They must be in a folder called images inside the pages folder for the slideshow to work.
NOTE: Never copy the index.html file – it will copy over your own index.html homepage.
Rename the gallery file as gallery_XXXX (XXX denotes whatever you want to name your new AutoViewer show). Copy this renamed file into the pages folder.
Copy the following html text into web page where you want AutoViewer show to appear:
<script type="text/javascript" src="swfobject.js"></script>
<div id="flashcontent">
 <script type="text/javascript" src="swfobject.js"></script>
<div id="flashcontent">AutoViewer requires JavaScript and the Flash Player.
Get Flash.</div>
<script type="text/javascript">
var fo = new SWFObject("autoviewer.swf", "viewer", "100%", "532", "8", "#FFFFFF");
fo.addVariable("xmlURL", "gallery_XXXX.xml");
fo.write("flashcontent");
</script>
NOTE: To make the AutoViewer go the full width of the webpage, I have changed the value in the var fo = line to “100%”
Change the gallery.html line to gallery_XXXX.html (the name of your new gallery file which you have copied into the pages folder) – this will link it to the right images.
NOTE: The source code you can get from the AutoViewer website does not include the extra line I’ve added here before the f0.write  This line you have to get from elsewhere on the site (or you can cut and paste the whole of the script I have provided here).
To change the following:
removing PLAY button or ARROW buttons
changing background colours,
brightness of images either side of central images in the slideshow:
These changes will affect every slideshow on the website as each AutoViewer slideshow uses the same swf source file.
NOTE: If you change the width/height of the slideshow in this code, it will only affect this one slideshow on this particular page.
In your AutoViewer folder (which you have downloaded) go to source > \source\com\airtightinteractive\apps\viewers\autoviewer\Options.
Save and then republish the SWF file – by opening source/autoviewer.fla in Adobe flash and FILE > Publish.
Copy this new autoviewer.swf file (which you will find in the AutoViewer web folder into the pages folder of your Dreamweaver site.
Part 4 – Uploading to your completed website to Dreamwaver
I used FileZilla.
Biggest problem here was the all the page files need to go directly into the wwwroot directory (if they are in a folder on the wwwroot directory your website will not work).
Once uploaded, you must manually, in FileZilla or Dreamweaver, move everything in the pages into the wwwroot folder. But you will also have to move the images in the pages > Images  folder into the images folder (as these images have to be in the fodler directly next to the html pages themselves.
Another note of caution: If you then upload new or amended pages through Dreamweaver they may go directly into the pages folder. You will then have to drag them out of there and into the wwwroot folder.
I have been dragging any updated html files in FileZilla – but this does not work unless you delete the html file you are replacing first (FileZilla offer the option to replace existing file for you, but this does not seem to work and updated pages are not visible when you check online).
If you add any images/logos to a page, don’t forget to copy them into the images folder in the wwwroot directory.
And finally...
Part 5 - Linking your uploaded files to your server
Nightmare this was.
It is going to change from server to server, where the name of their folders and files are not exactly the same as those in Dreamweaver.
In Dreamweaver:: SITE > mange site > select your project in the pop-up box > EDIT
Click on Testing Server (CS4):
Server model: [none]
Access: [FTP]
FTP host: [your host website login]
Host directory [/wwwroot – though this may differ for other website host companies]
Login: [your host website login]
Password: [your host website login]
URL prefix: [something like this: ftp://XXXXXX@XXXXXX/wwwroot/]
Then click on TEST
Hopefully this will now connect with your webhost.
NOTE: Getting the URL prefix was not easy. I emailed my webhosting company several times – they were no help. To be honest, I’m not sure where I actually got for the prefix from in the end – possibly SITES > Manage > unnamed server > edit. Comments here welcome.
The End.
Thanks for sticking with me. This guide is far from comprehensive - but it may just save your sanity.

Monday, January 24, 2011

The gazcook.com website fiasco

Around 12 months ago I was awarded a £3,000 innovation voucher from the Northwest Regional Development Agency.

The idea of the voucher is to help creative businesses develop by spending their voucher with organisations and institutions signed up to the program.

My voucher was awarded for the design and development of an online image management system. Or, as I understood it, a website where I could sell images and deliver images securely to clients.

I chose a Manchester-based company to carry out the work. Several months and a dozen appalling templates later, I put in a complaint against them and the website never got completed. I lost the chance to spend the voucher.

There were several areas where I felt they had fallen short. Here are some of the designs they came up with:

Direction_1
Direction_3
Having had only a shell of a website online for over two years I have decided to rebuild and finish off my website myself.

Earlier this month I did a one-week training course on Adobe Dreamweaver with Academy Class (Ian Gilbert did the teaching and was excellent) and partially funded by Vision+Media.

I’m halfway through the design of the all new gazcook.com

The website retains the same front page, though I have rebuilt it from scratch, with every other page brand new, including the projects page I have invested extra attention to. It's coming soon.

Friday, October 22, 2010

Merry Christmas! Cards for sale


If you ever wanted to know what Christmas looks like in Great Britain, then these are for you.
My Merry Christmas! cards have now been printed, delivered and are now for sale.
There are twelve different delicious documentary designs.
For one single card the price is £1.60 (includes P&P) - but you can the entire twelve-card set for a remarkable documentary-image busting price of £9 (includes P&P).
My email is on the poster - get in touch to place your order.
It is now late October 2010. No time to waste.

To order packs of 12 Merry Christmas! cards- see top right of page


Sunday, November 29, 2009

Shortlisted: Travel Photographer of the Year 2009

You can travel right around the world.

You can cross four continents.

You can take some fantastic photos*.

And you can get nominated for the 2009 Travel Photographer of the Year awards.

But where in the world were my four short-listed images taken? Himalayan mountains, Bethlehem, Kiev, Tunis or Topeka.


None of the above. 

The answer is, of course, my favourite frivolous weekend destination, the hardcore venue that everybody loves to hate and the place where brash meets trash with appealingly appalling consequence. Yes, it's Blackpool, Lancashire.


This week I sent off my four prints (excellently done by Genesis in London) to the TPOTY organisers for final judging. The result is announced in December (though possibly not on this blog if I fail to bag the first-prize trip to China).


NOTE: The above image was can be seen elsewhere on this blog. It is one of the images in my short-listed submission to TPOTY's Homeland category.
* The term 'fantastic photos' is not necessarily the opinion of this photographer and his over-inflated ego.

Tuesday, September 15, 2009

Museum of the People


It took seven-and-a-half hours to get there. Preston, Lancashire, to Deptford, London. I’ve had better journies.

But it was worth it to see six of my Outsiders photos form part of the Museum of the People exhibition at Utrophia, curated by Evie Manning (she’s from Bradford but is half Geordie thanks to her lovely mum).

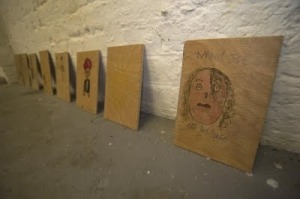
There was some intriguing and highly personal work on display. I particularly liked the drawings by the local school kids of who they would like to interview for the project, based around my Outsiders project.

Did I like these because they were inspired by my photos? Probably.


Wednesday, September 02, 2009

The Outsiders project

The first half of my project Outsiders has been completed.

It’s a book of portrait photographs and accompanying interviews.

The profiles examine how we judge others, not just through the experiences of the subjects but also by our own thought processes while reading the interviews.

Subjects include a politician, a Ukrainian rock star, a homeless person, a treasure hunter, a vicar, a homosexual hater, a transgender dominatrix and a paedophile.